Like nearly everyone else who’s alive, I check out pinterest and very sadly I have seen awful no knead bread recipes. I have struggled with bread baking for years. From TBF (total bread failure) to PBF (partial bread failure), I’ve seen a lot and struggled with consistency using similar recipes and instructions. I have about 5 bread books and after tutorials and whatever other resource I could find, I have finally been able to consistently bake bread that rivals albertsons or publix fresh baked bread. You southerners know what I’m talking about.
This recipe is only for using the no knead method for bread, it does not apply when hand kneading or machine kneading.
Here are some problems with the bread recipes I see. They do not allow proper proving before baking. One cannot get a strong gluten structure with one rise. Nope, I’ve tried it. And if you wiggle the bread too much, it all deflates! Also… a 30 minute rise is horribly insufficient. Here may be some common troubles with your bake.
bread deflates – improper structure, improper proving
tough crust – improper gluten structure
tough crust and gummy center – improper gluten structure and didn’t cool long enough! (I know, it’s so hard to let it)
dense bread, didn’t rise at all! – yeast probably died, didn’t get a proof
If you’ve had these problems, I know I have! Then you’ve listened to those blogs from people who listened to blogs or got an insufficient book and looked no further. I have a couple and I have followed these blogs. These sweet dears probably do not know that it’s possible to make the awesome bread in the stores. I thought, maybe there are additives or preservatives for those results, like in box cake… no… the instructions were out there and I wish I had found them sooner. So! I will share my recipe and instructions and then explain “the why”. For best bread, please read all the way through.
Simple boule (round bread, or “bowl” bread)
3 cups all purpose or bread flour
1 1/2 cups distilled water (adjust 10% increase for dry climates, adjust atleast 10% additionally for altitude)
1 Tbsp yeast
3/4 Tbsp – 1 Tbsp salt (to taste)
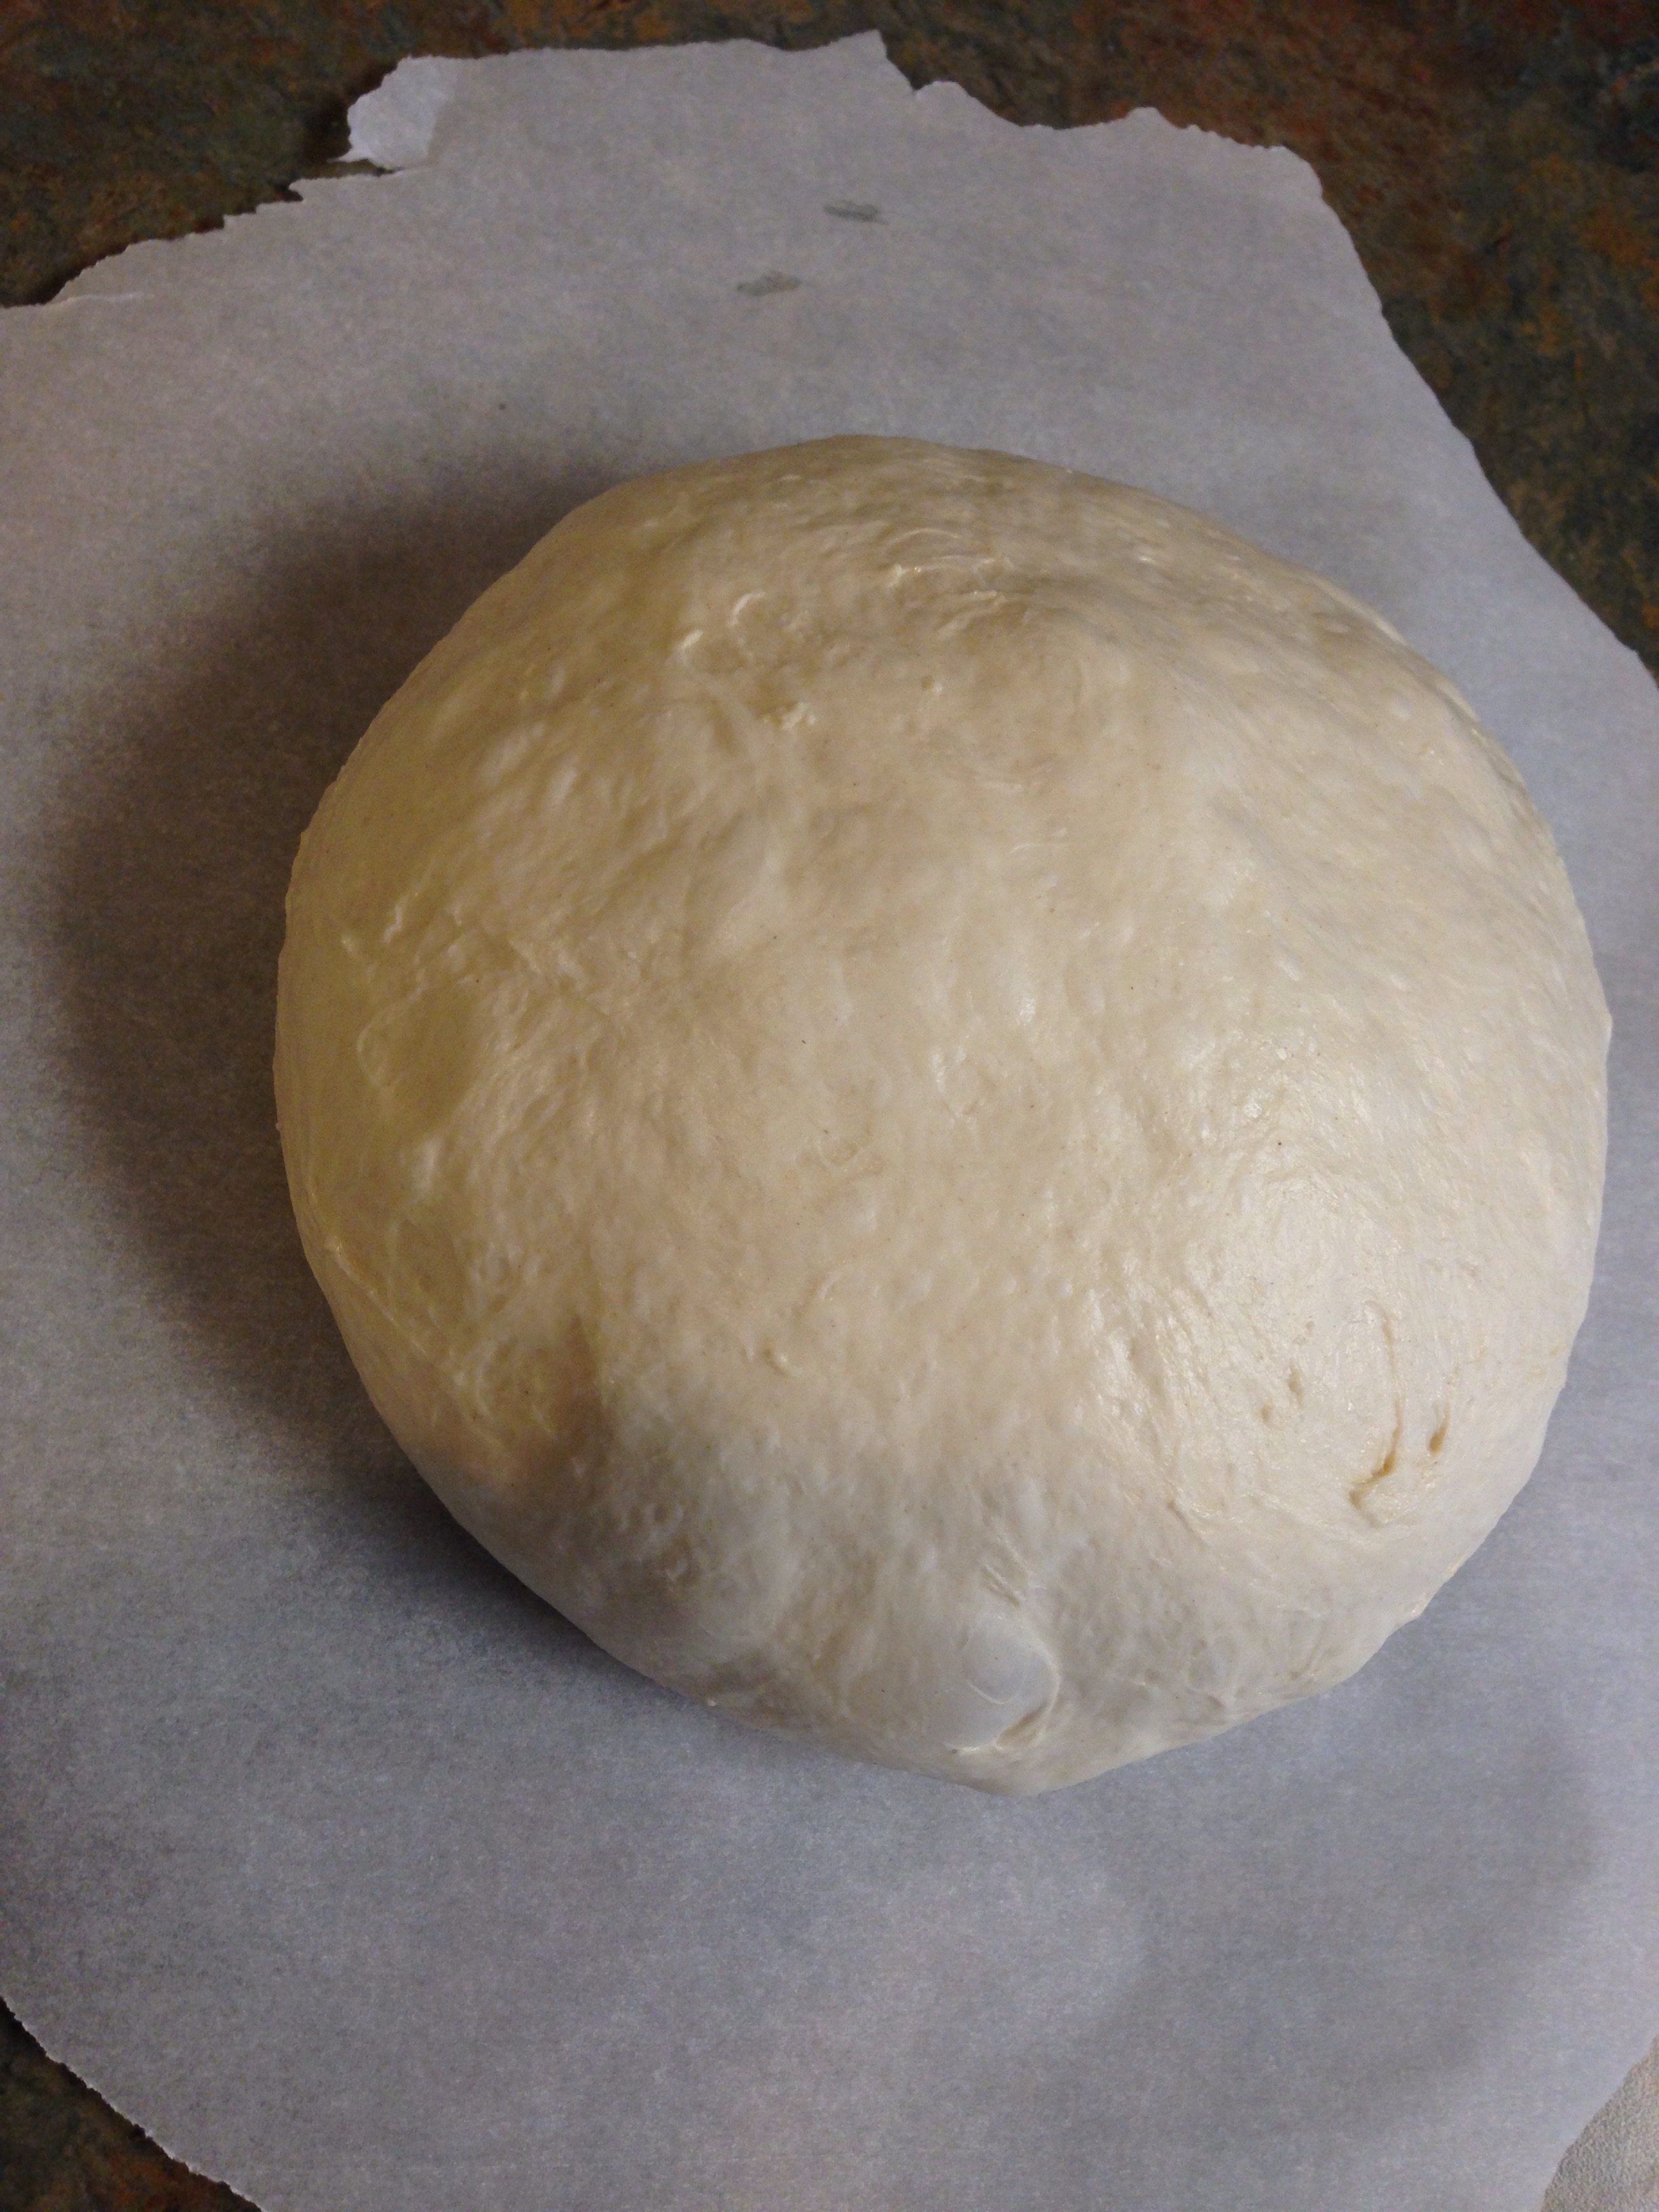
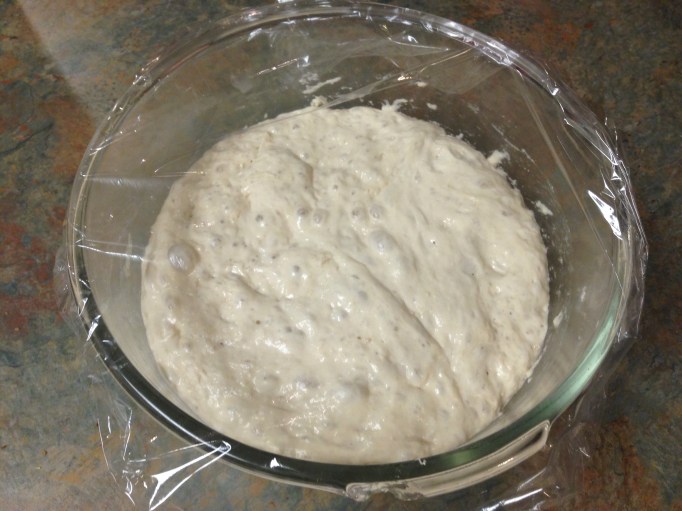
Mix flour, yeast, and salt together in your largest bowl. Pour in your water and mix. I like to use my hands or a butter knife. Yeah, may sound crazy but it works and cleans off easily. You want to mix to make sure the flour is all incorporated or you’ll end up with “flour pearls” and that makes for ugly (and homemade looking) bread. Once you’ve got a nice sticky heap, cover and set aside for at least 2 hours!
Dust the top of the risen dough, a clean work surface and your hands with flour. Your dough should still be quite sticky and droopy. Shape your dough into a rough rectangle. Lightly dust with flour (called a gluten coat… I don’t know why), and fold into thirds. Take your dough and fold that in half and drop into an oiled bowl (or sometimes I dump it back into my previous bowl with dough residue… just slightly more work to get it out if you do it this way). Your dough will rise much quicker this time. Maybe a 30-45 minute rise.
Take it out (do not punch it!!!!!) and shape into a ball. (Shape into a ball – bread term meaning to pull sides down and gather to the bottom of the dough to make into a ball. Go around the dough and get all sides. You want a somewhat taut surface, pull sides and gather at the bottom as needed) Allow the air bubbles to pop out (this will prevent giant holes in your bread). You want to achieve a taught surface without the dough tearing. This surface provides tension for your yeast to rise against and further develop the gluten.
Optional- return to the bowl for another rise about 30-45 minutes. This extra rise can give a somewhat sour flavor if that what you’re going for.

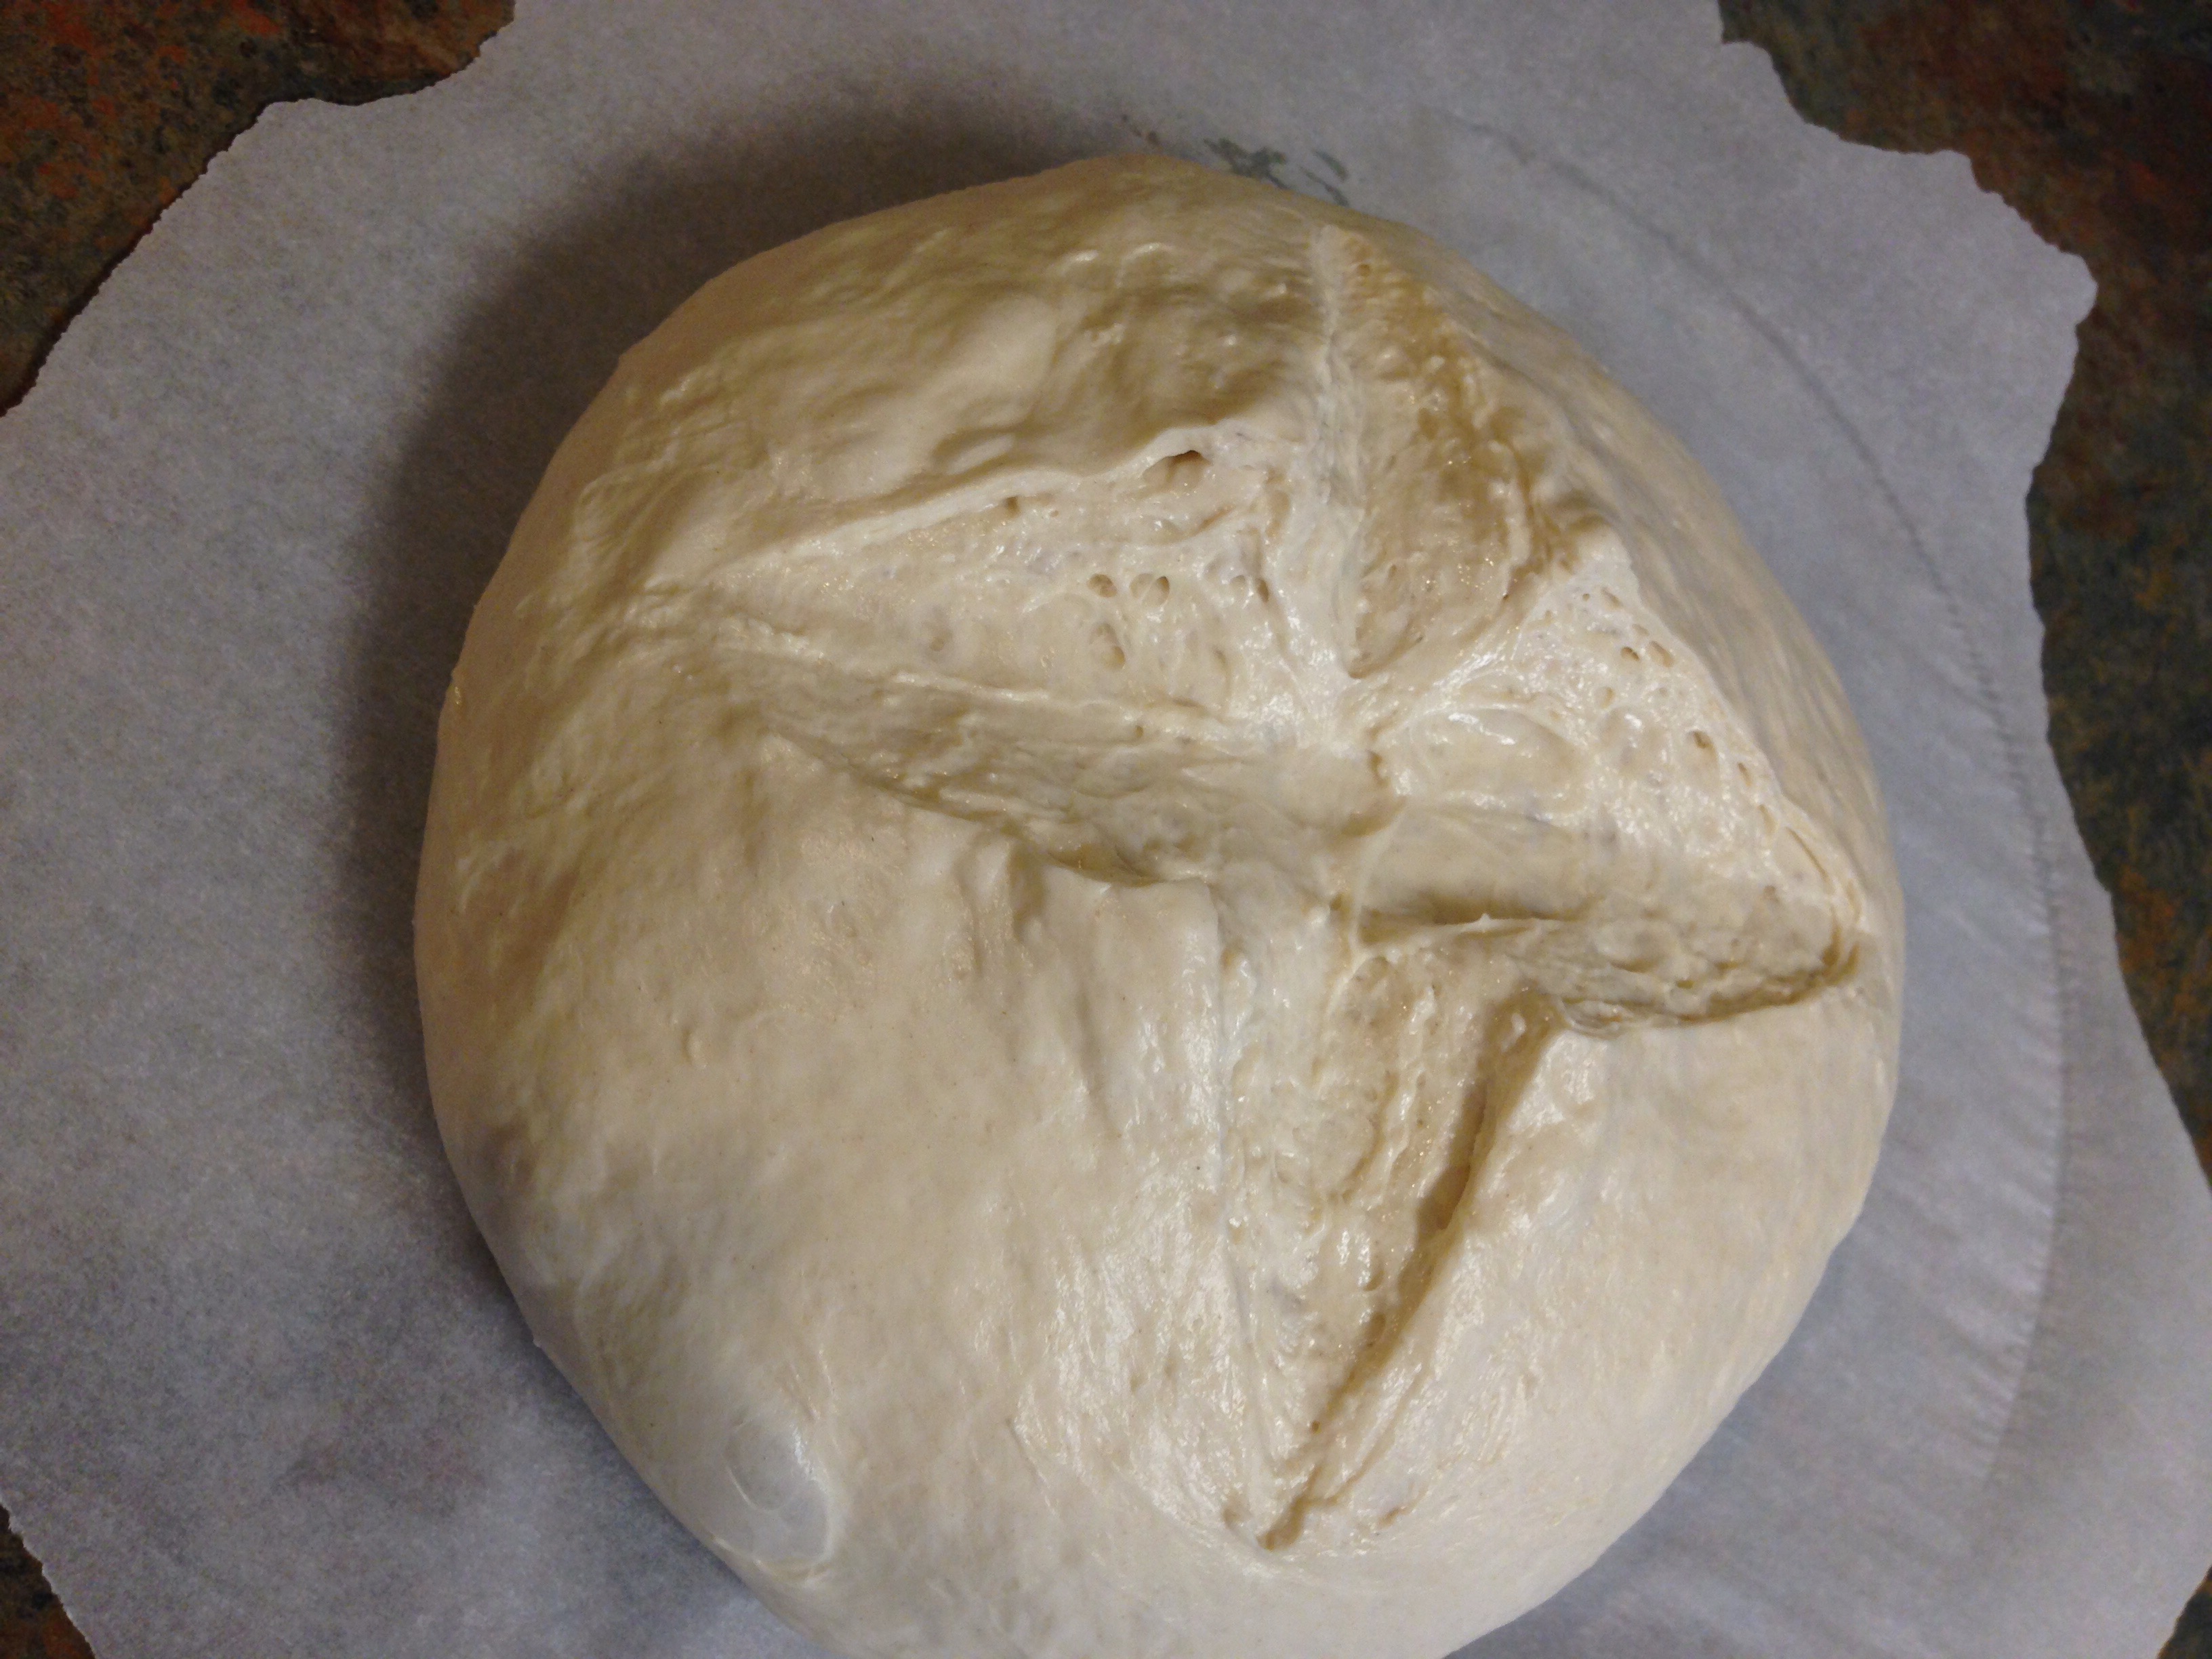
Heat your oven to 475 and place your dutch oven to heat up. (If you don’t have a dutch oven, that’s okay… but I’ve found it makes the best bread when doing the no knead method.) Prep your parchment paper for either the dutch oven or your baking sheet. Shape your dough again into a ball and set on your parchment paper. Place your bowl it came out of on top of the dough so that it doesn’t dry out during this proof. I let it rise anywhere from 30-40 minutes (better than an overproof).

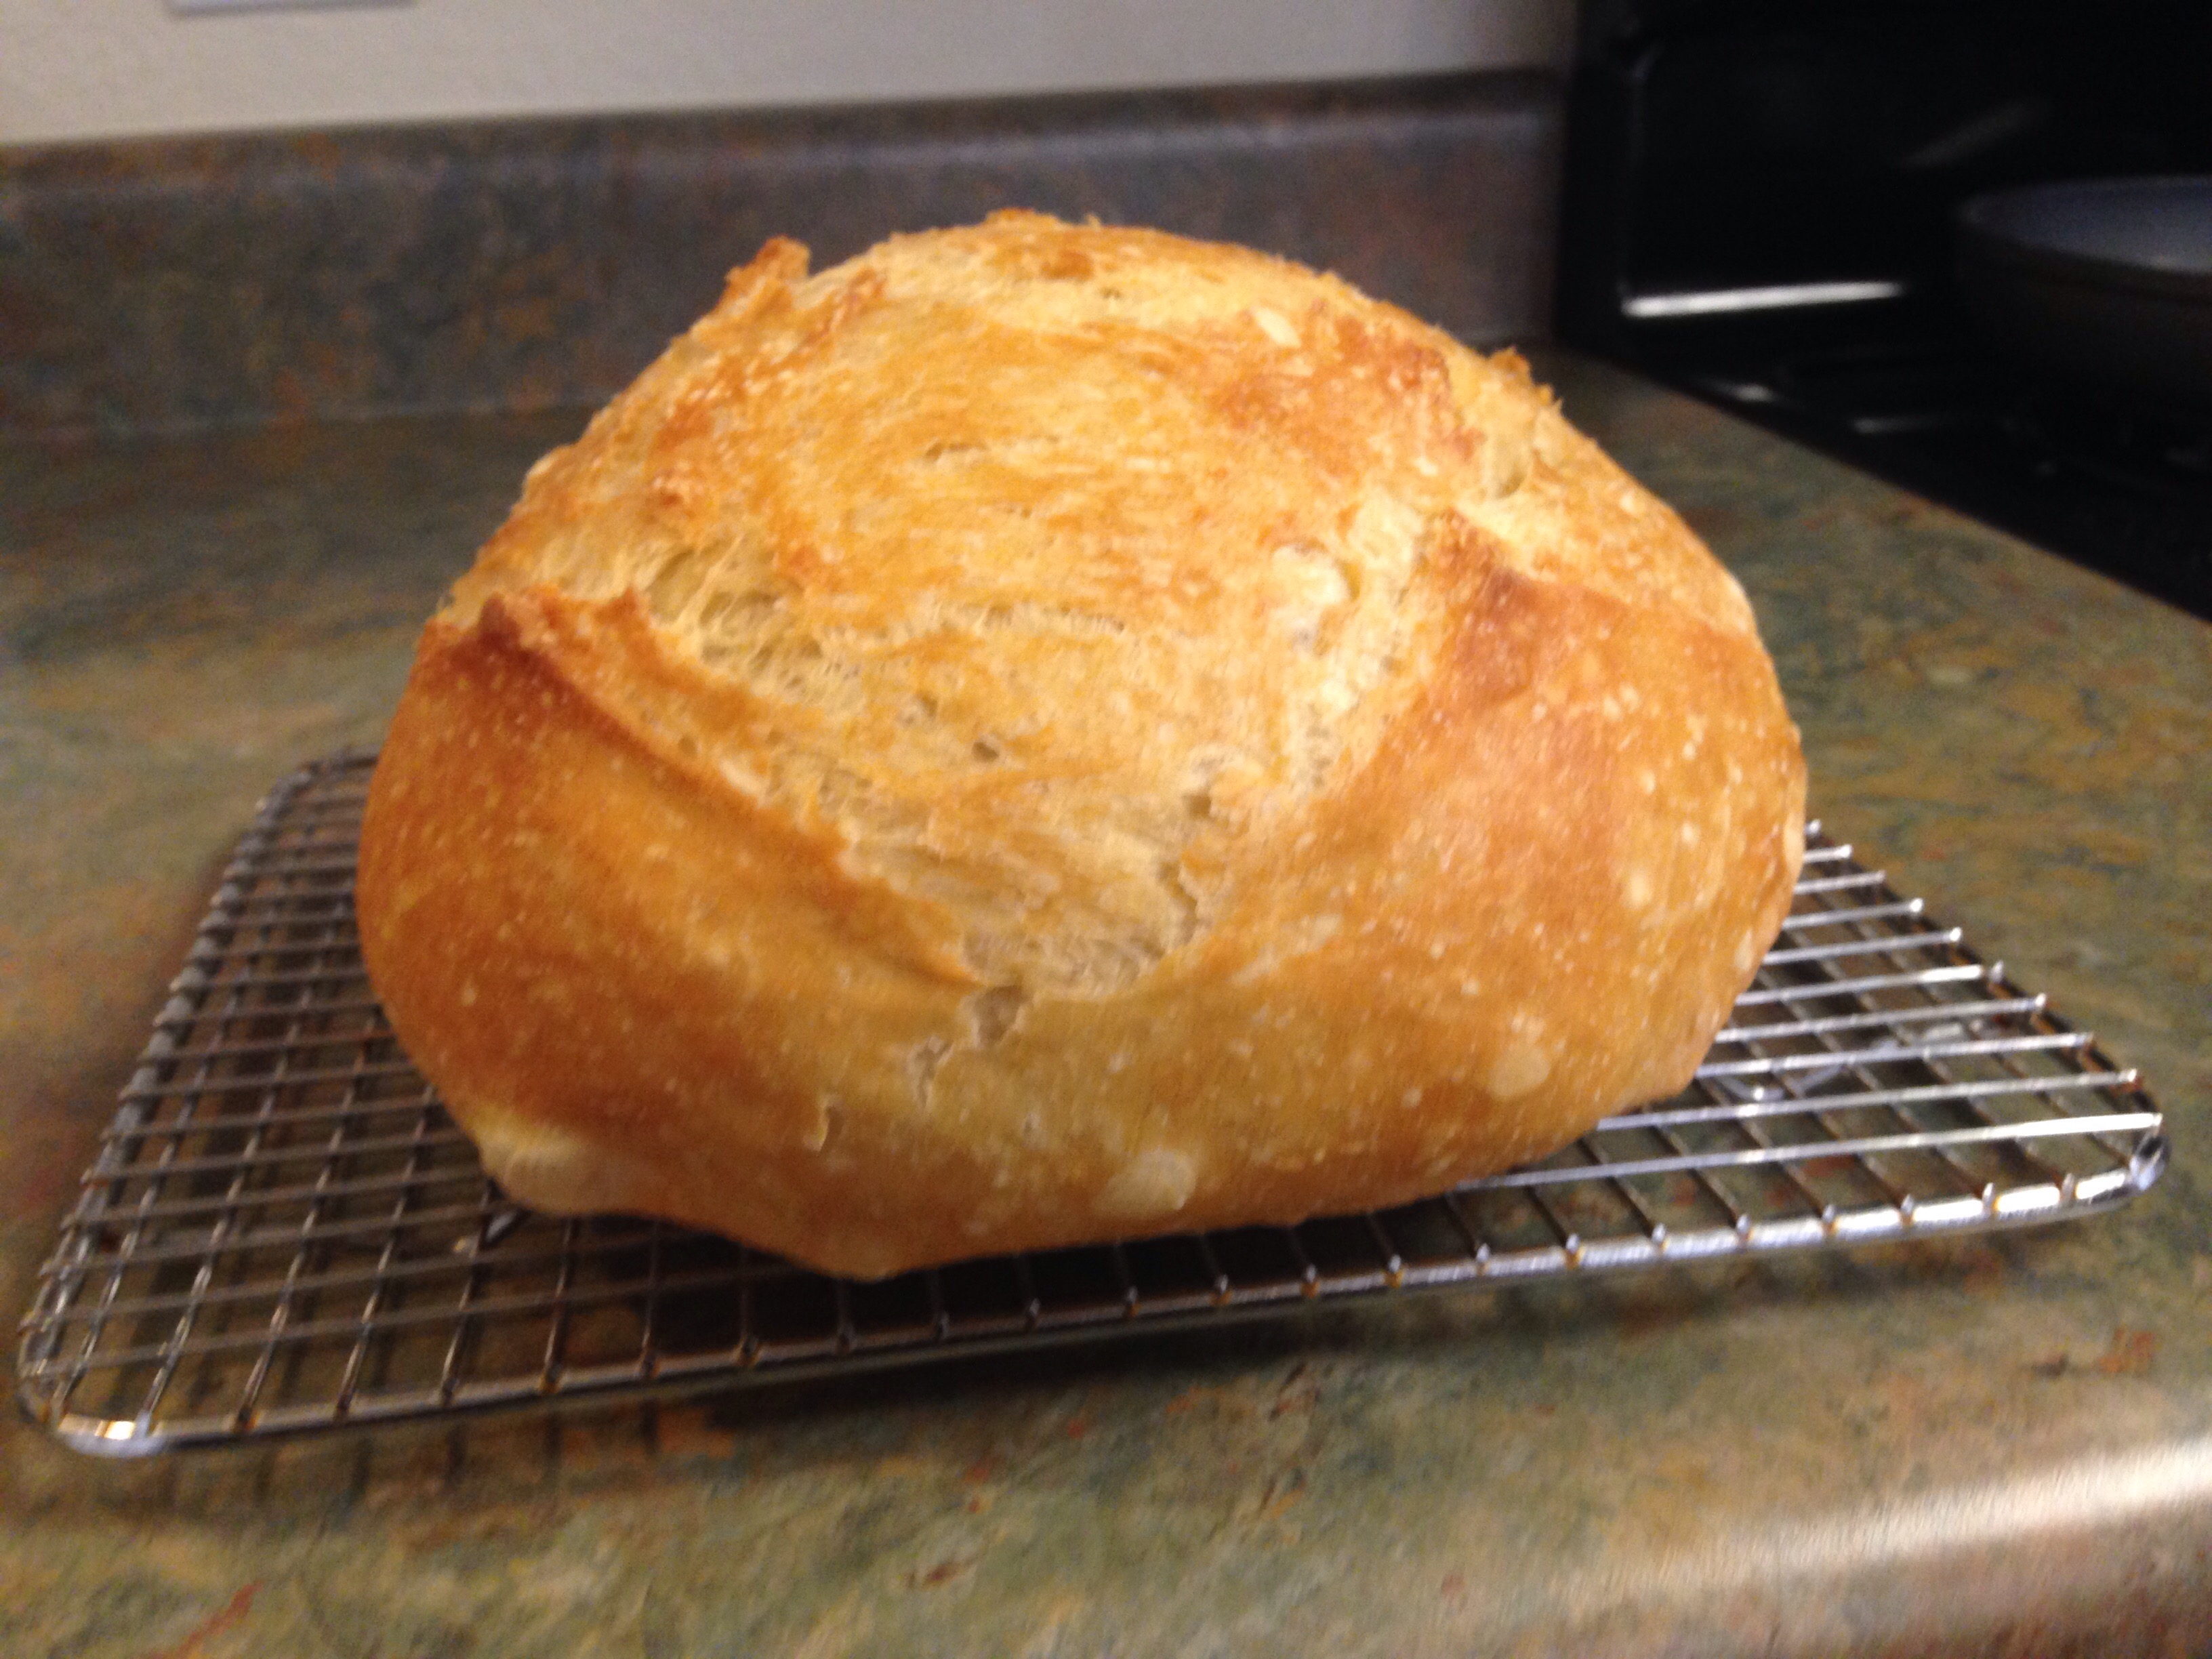
Take a knife and slice at least a half inch into your dough, deeper if you dare! Remove your dutch oven from the oven and drop your dough into it! Place the lid and set your timer for 45 minutes!

Once done, remove and let cool for at least 20 minutes. Listen to that beautiful crackling and revel in the joy of a good bake 🙂


The Why’s
Now, the reasons I do these things. Many recipes call for yeast to be added to water to bubble… other than find that your yeast is alive, it doesn’t serve much purpose. This is different than what is called “creating a sponge” which is a developed base for your bread. That’s like a bread soup or bready paste to be added to flour later for more complicated breads, very different. The problem that could develop is the warm water… what exactly is warm water? I’ve known people (and done this myself) who have microwaved the water to get to a higher temperature and accidentally zapped those poor yeast and hence… no rise. Now improper yeast storage is also a problem! My poor yeast didn’t rise because they were all dead! Store your yeast jar in the fridge. Also, adding sugar changes the taste of the bread which could be nice in some instances but for regular ole bread, it isn’t needed.
Well… my yeast was refrigerated and I did this recipe, but my bread still didn’t rise! Okay… did ya use distilled water? hmm? The reason to use distilled water is that the chlorine (in all tap water) kills the yeast! Chlorine kills everything, that’s why it’s a great disinfectant. Purified water isn’t good enough, most come from the tap of wherever it’s bottled. Sad truth. I have found that in a pinch, a thrice filtered water isn’t so bad. Not as great as distilled but kills less yeast than tap. I’ve also used distilled water that is enriched with minerals (because I couldn’t find distilled) and it’s about the same as a thrice filtered tap water. For best rise, go with distilled. Reverse osmosis water is good too.
The reason for shaping and reshaping the dough is to develop the gluten. Gluten is the protein in wheat flour that come together in a matrix that leads to a chewy texture, think pizza crust vs cake. In the no knead method, the yeast bubbling away is enough agitation to develop the gluten into a matrix. But one rise is not enough. You may have heard of the “window pane” test to see if your bread is ready (you can stretch your dough until it’s thin and lets light through or almost see out of it). You will not get a window pane with a one rise dough. This is why your bread will deflate because the gluten is not developed enough to provide structure to hold it’s shape. This is why you shape and reshape. Having the tension is essential to develop the bread.
Slicing the dough, besides giving a pretty design to your bread, gives the dough room to rise so you have less broken edges. Some is nice but you have a more finished looking product with slices. Or cuts! Many one rise recipes do not include a slice because with the gluten not being developed, the bread will immediately deflate once cut. It also isn’t as able to be as fluffy on the inside! While talking of texture, it’s very important to let your bread cool because if you tear into it too early, the moisture will evaporate out of the bread! That is how you end up with a gummy texture. The bread needs time for the moist hot air to redistribute back through the bread, this also helps give a softer crust too. Prior to learning these additional steps, I always had incredibly thick and tough crust. I love a good crust but this was bordering on tooth breaking.
So, I hope that your bread turns out wonderful and you enjoy the sweet music of crackling crust from fresh baked bread. Happy baking!